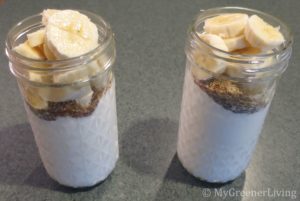
I was a self-proclaimed liquid soap/liquid body wash girl until I started shaving with a double edge safety razor (that’s a topic that I will post about later). Short story is I decided I wanted to use a double edge safety razor last summer, because it is 100% metal (no plastic to eventually throw away), no disposable cartridges, and the steel blades are recyclable. Oh, and did I mention it’s WAY cheaper than using disposable razors or disposable cartridge razors? Right, right, this article is about soap, not my awesome razor. Back to that point. So, upon purchasing my razor, I read that bar soap is the best thing to apply to skin before shaving with a double edge safety razor. The previous Christmas my aunt had given me an all natural bar soap. No artificial ingredients, no chemicals. I tried it an no allergic reaction. Yay! I told her how much I love that soap, and now I have about a 3 year supply. But, me being me, decided that I have happened across enough soap making recipes in my Pinterest perusing that I want to make it myself. Because, I like making natural products, I like the price of home made natural products, and chemical reactions are cool. CAUTION: making soap requires lye. Lye is extremely basic, it is caustic to the skin – it will burn you on contact; and the fumes are toxic. Use extreme caution, and keep kids and pets away for their own safety.
Disclaimer: This post contains affiliate links, which means I may receive compensation if you make a purchase through these links. There is no cost to you. See my Disclosure Policy for more information.
I have found countless recipes and instructions online. My main inspirations were from offbeat & inspired and Veged Out. If you want to read others’ recipes and instructions, check out those posts about the cold process soap making that I used when making my soap. You can also check out the Prairie Homestead for a hot process/crock pot recipe. The hands on time for cold and hot process soap making is about the same, but cold process soap needs to sit for 4-6 weeks to fully harden, whereas hot process soap only needs to harden for 1-2 weeks (it actually can be used immediately but is very soft and will get used up much more quickly).
Since I like to be difficult, I decided to use my own selection and ratio of ingredients (ok, I am sure there is a blog post out there making the same soap, but I haven’t found it). Lucky for me, there are some great resources out there that have already calculated the amount of lye required to saponify each oil type. Saponification is the chemical reaction in which the combination of water and lye plus fat (oil) turns into soap, that awesome necessary cleaner that is safe for skin – no more caustic lye! All I needed to do was determine my amount of oil (by weight – everything is done by weight in soap making), plug it into this handy calculator, and I had the amounts of each ingredient, by weight, that I needed to make my soap.
I chose to use a 2:1 ratio of olive oil to coconut oil. I wanted a simple, few-ingredient recipe, and chose olive oil for its moisturizing properties, and coconut oil because it’s great for cleaning, and I just love coconut oil. Referencing Nature’s Garden Soap Oil/Butter Properties sheet, I followed the suggestions of 5% superfat (5% more oil than needed to saponify lye), and 38% water for bars of soap. I went to soapcalc.net’s soap calculator, which Nature’s Garden suggests using, and selected 10 ounces coconut oil, 20 ounces olive oil, 6% superfat (for extra moisturizing), and 38% as my water as a % of oils. The results yielded the following ingredient amounts, all by weight:
10 ounces (283.50 g) coconut oil
20 ounces (566.99 g) olive oil
11.4 ounces (323.18 g) water
4.27 ounces (121.03 g) lye (NaOH)

If you’re trying to judge sizes of containers needed, this is roughly 4 cups oil, a little over 1+1/4 cup water.

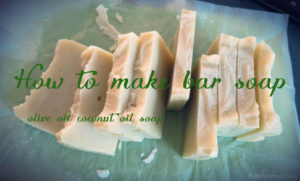
Olive Oil Coconut Oil Bar Soap
Ingredients
Ingredients
- 10 ounces 283.50 g coconut oil
- 20 ounces 566.99 g olive oil
- 11.4 ounces 323.18 g water
- 4.27 ounces 121.03 g lye (NaOH)
Supplies
- immersion blender
- large glass ceramic, or steel container for mixing soap
- glass ceramic, or steel bowls or measuring cups for measuring ingredients
- microwave crock pot, or stove for melting oils
- kitchen scale
- silicone spatula or wooden spoon
- soap mold can be as simple as a box or pringles tube lined with wax paper
- gloves safety glasses
Instructions
- 1. Prepare your soap molds. I use wax paper lined cardboard boxes and pringles tubes.
- 2. Measure the water by weight, pouring into a glass, ceramic, or steel vessel. Ensure that your water is room temperature or cooler (Combining lye with water is exothermic - the solution gets hot. If you start with hot water the reaction can get so hot that it boils, increasing the danger of working with lye).
- 3. Place the container with the water in a well ventilated area where it will not be disturbed. I use my sink with the nearby window open. Wearing safety glasses and gloves, carefully measure the lye. Slowly pour the lye into the water and stir gently with a wooden spoon or silicone spatula to dissolve.
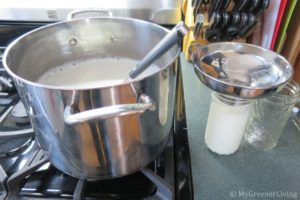
- 4. Measure the oils into a large glass, ceramic, or steel container. Heat slowly until the solid oils are fully liquefied. I use the ceramic pot from my crock pot, and heat either in the crock pot on "warm" or "low", or I microwave the pot with oils.
- 5. Carefully pour the lye solution into the oil solution. Using an immersion blender, blend the solution until achieving trace, typically 3-5 minutes. Trace means that all of the lye is fully mixed in with the oils, and is achieved when the solution has a cake batter to pudding-like consistency; when the blender is lifted out of the soap and drizzles on the surface, traces of the drizzles stay on the surface.
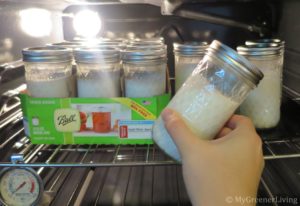
- 6. Pour the soap into molds and place somewhere that the molds can be left undisturbed for 24 hours. I have used a closet and my microwave. At this point the lye is still present in the soap, so use care not to touch it.
- 7. After 24 hours, you may test the soap to determine if it has fully saponified. Several methods are described here; I use the "tongue test" - touch the tip of your tongue to the soap. If you feel a zap - like touching your tongue to a 9 volt battery - the saponification process is not yet complete, and you should leave the soap for several more hours.
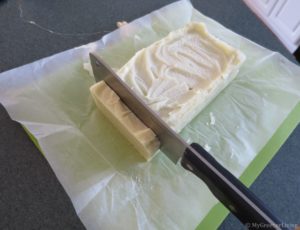
- 8. Remove the soap from molds and cut to your desired size. I found that a meat cleaver worked really well. Hey, I finally found a use for this knife! What else do you expect a vegetarian to do with a meat cleaver? The soap is still somewhat pliable at this point, so be careful not to make undesired marks with your tools or fingers. You can also use this time to smooth edges on your soap.
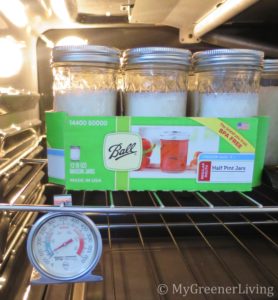
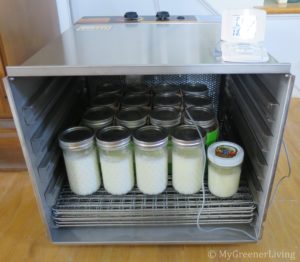
- 9. Place the soap bars to dry. I line a large shallow box with waxed paper and stand the bars up on end with space between each bar. Allow the soap to dry at least 6-8 weeks before using. Longer dry times should result in harder soap bars that last longer.
Supplies
- immersion blender
- large glass, ceramic, or steel container for mixing soap
- glass, ceramic, or steel bowls or measuring cups for measuring ingredients
- microwave, crock pot, or stove for melting oils
- kitchen scale
- silicone spatula or wooden spoon
- soap mold (can be as simple as a box or pringles tube lined with wax paper)
- gloves, safety glasses
Instructions
- Prepare your soap molds. I use wax paper lined cardboard boxes and pringles tubes.
- Measure the water by weight, pouring into a glass, ceramic, or steel vessel. [Measurement by weight is critical to ensure that you do not end up with unsaponified lye in your soap. If you don’t have a digital kitchen scale, I personally love and recommend this American Weigh Scales digital kitchen scale.] Ensure that your water is room temperature or cooler (Combining lye with water is exothermic – the solution gets hot. If you start with hot water the reaction can get so hot that it boils, increasing the danger of working with lye).
- Place the container with the water in a well ventilated area where it will not be disturbed. I use my sink with the nearby window open. Wearing safety glasses and gloves, carefully measure the lye. Slowly pour the lye into the water and stir gently with a wooden spoon or silicone spatula to dissolve.

weighing lye - Measure the oils into a large glass, ceramic, or steel container. Heat slowly until the solid oils are fully liquefied. I use the ceramic pot from my crock pot, and heat either in the crock pot on “warm” or “low”, or I microwave the pot with oils.
- Carefully pour the lye solution into the oil solution. Using an immersion blender, blend the solution until achieving trace, typically 3-5 minutes. Trace means that all of the lye is fully mixed in with the oils, and is achieved when the solution has a cake batter to pudding-like consistency; when the blender is lifted out of the soap and drizzles on the surface, traces of the drizzles stay on the surface. I didn’t get any pictures of this, but if you’re unsure if you’re there, read this SoapQueen post.
- Pour the soap into molds and place somewhere that the molds can be left undisturbed for 24 hours. I have used a closet and my microwave. At this point the lye is still present in the soap, so use care not to touch it.
- After 24 hours, you may test the soap to determine if it has fully saponified. Several methods are described here; I use the “tongue test” – touch the tip of your tongue to the soap. If you feel a zap – like touching your tongue to a 9 volt battery – the saponification process is not yet complete, and you should leave the soap for several more hours.

bar soap setting in a makeshift cardboard box mold - Remove the soap from molds and cut to your desired size. I found that a meat cleaver worked really well. Hey, I finally found a use for this knife! What else do you expect a vegetarian to do with a meat cleaver? The soap is still somewhat pliable at this point, so be careful not to make undesired marks with your tools or fingers. You can also use this time to smooth edges on your soap.
cutting the soap - Place the soap bars to dry. I line a large shallow box with waxed paper and stand the bars up on end with space between each bar. Allow the soap to dry at least 6-8 weeks before using. Longer dry times should result in harder soap bars that last longer.
I let this soap dry for 6 weeks. I separated the soap bars to allow maximum surface area to be exposed to air for faster drying, and tucked it in a closet to keep it out of my way. After 6 weeks and 2 days I tried it out. Good lather, smooth feeling, and doesn’t feel like it leaves a soap scum on my skin like standard commercially available soap. It does seem to get used up faster than other soaps. I’ll try letting the other bars dry longer, and see if it makes my soap last longer!

Cost
Organic coconut oil, melting point 76º Fahrenheit, 54 fl oz (1459g) for $14.99 at BJ’s Wholesale Club. (or Amazon)(283.5g/1459g)x14.99=$2.91
Organic extra virgin olive oil, 1L (928g), $6.99 at Ocean State Job Lot. (566.99g/928g)x$6.99=$4.27 (or Amazon)
Lye, sodium hydroxide, 1 lb (453.59g), $4.49, after tax, $4.80. (121.03/453.59)x$4.80=$1.28 (or Amazon)
Distilled water, 128 fl oz (3,785.41 grams), $0.98 at Walmart. (323.18g/3785.41g)x$0.98=$0.08
This recipe yields about 30 ounces of bar soap, and costs $8.54, which is about $0.285 per ounce or $1.14 per 4-ounce bar. For comparison, I can get Kirk’s coco castile soap for $3.28 for 3-4oz bars at Walmart, which is $1.09 for a 4 oz bar. A 6 pack of Dove 4 ounce bars is $6.88, or $1.15 per 4 oz bar. My soap is just about the same price (sometimes less expensive, as I try to purchase my ingredients with coupons), PLUS I know that I used only high quality ingredients safe for my body. And, I got to do a fun science experiment!
Note that when I calculate cost of my recipes, I assume that all of the product will be used, therefore the cost per recipe uses only the fraction of the product used in the recipe. I know that I will be using the rest of the product in other recipes, so I can justify calculating cost in this way.