
Last year I posted how I make yogurt. After making it a few times, I was surprised how easy it is! And, like most of my homemade creations, I feel satisfaction making things. Guess what? You can make Greek yogurt, too, and it is just one extra step!
Disclaimer: This post contains affiliate links. See my Disclosure Policy for more information.

Ingredients and supplies
- 4-6 oz starter yogurt (per gallon of milk)
- I have used Dannon All Natural Plain Nonfat Yogurt, a plain store-bought Greek yogurt, or some of my homemade regular or Greek yogurt
- milk of your choice (skim, 1%, 2%, whole, even almond and coconut are supposed to work!) – I prefer 1% cow’s milk
- Stove
- Oven, dehydrator, yogurt maker, or large cooler
- pot large enough to hold the volume of milk you’ve chosen to turn into yogurt
- sealing jar(s) for “cooking” the yogurt (I use quart, 1 liter, or 2 liter mason jars)
- whisk, fork, or blender
- Cooking thermometer the reads between 100 and 175 degrees. I like my Oneida digital thermometer – it has an alarm to alert me when the desired temperature is reached, when temperature is increasing (does not work on the cool-down)
- flour sack towel or tight weave dish towel
- large colander
- 10-12 cup or similar large bowl for yogurt to drain into (could reuse the large pot above)
- large watertight container to fit the pot. I use my sink.
- water (and optional ice/ice packs) for cooling the pot of milk
- helpful: funnel that fits your “cooking” container
- helpful: ladle or measuring cup/cup with handle to scoop yogurt into containers
- optional: sweetener of choice. I use pure stevia powder
Instructions to make Greek yogurt
- Sterilize jars and cooking utensils. Place cooking jars and utensils in a large pot. Cover with water. Heat and bring to a boil. Maintain the rolling boil for 15 minutes, then turn off heat. Leave the jars in the water or remove and set aside if you need to heat the milk in the same pot. For more information rad this post from The Spruce. *Note: I no longer sterilize my jars. The reason for sterilizing is to kill any bacteria that could potentially kill your yogurt cultures. While it is SUPER frustrating when that happens, it’s only happened to me once in maybe 20 batches, and the amount of time saved by NOT sterilizing it worth it to me. This is a personal choice, but from a food safety standpoint I say “Do as I say, not as I do” and sterilize your jars!*
- Pour milk into large pot. Insert thermometer into milk and attach to pot if possible. I have a digital thermometer with a long cord. I use a clothes pin to clip the cord to the pot handle, which holds the thermometer probe in the pot of milk, away from the side. Heat the milk over low-medium heat until it reaches 170 degrees Fahrenheit, stirring periodically. Immediately remove from heat. Notes: Low heat will take a lot longer to reach 170 degrees, but is less likely for the milk to burn onto the pan. Medium heat will achieve the desired temperature faster (30-45 minutes on my stove), but the milk will burn onto the bottom of the pot a little. Not a problem, but a pain to clean.

heating milk to 170 degrees - Place the pot of hot milk into a watertight container filled with water. I put the pot in my sink, fill the sink with water to the height of the milk in the pot, and place several ice packs in the water. Stirring occasionally, cool the milk to 115 degrees Fahrenheit.

cooling milk to 115 degrees - After the milk cools to 115 degrees Fahrenheit, take the pot out of the cold water. Combine your starter yogurt with about a cup of warm milk an mix well using a fork, whisk, or small blender (I am lazy and love using the single serving cup of my Ninja). Pour the milk-yogurt mixture into the pot of warm milk and stir well. If you’re sweetening your yogurt you can add it to the large pot now, and stir, or add to the individual jars if you’re portioning. I add sweetener just before eating, since I need different amounts of sweetener depending on which mix-ins I have selected.

mix starter yogurt with warm milk - If “cooking” yogurt in the oven, preheat your oven to the lowest setting. Turn it off before it reaches temperature. You’re aiming for about 110-115 degrees Fahrenheit. I have a thermometer inside the oven that helps me regulate the temperature. If “cooking” yogurt in a large cooler, heat water to 110 degrees and pour into cooler. If “cooking” in a yogurt maker, follow the instructions on your yogurt maker. Or if “cooking” your yogurt in a dehydrator, follow turn on to 115 degrees and optionally, set the timer. (I recently purchased this food dehydrator, which I love. Since the set temperature is based on a specific ambient surrounding air temperature – about 70 degrees, I think, I used my cooking thermometer to verify the internal dehydrator temperature.)
- Pour your yogurt into “cooking” jar(s). I have always used glass, and recommend glass due to its non-reactive nature and tolerance to heat and cold.

pour milk with starter yogurt into “cooking” jars - Wipe the top of your jar(s) and put the lids on.
- Place the jars in the oven or cooler with hot water and let the yogurt “cook”for 4-12 hours. The longer the yogurt “cooks”, the more tart it will taste – more like Greek yogurt flavor. I prefer to cook my yogurt for 10-12 hours (the dehydrator comes in handy here) – it results in a thicker yogurt, consistency similar to store bought yogurt. When using the oven, I check my oven temperature hourly, and if it’s dropped below 100 degrees Fahrenheit, I turn the oven on briefly (I have a gas oven, so 30-60 seconds, including the time before the burner ignites). This usually boosts the temperature to about 115 degrees, optimal yogurt making temperature. *Use caution not to let the oven get much above 115 degrees, it could kill the live yogurt cultures. Don’t worry if the temp is 120 or 125 degrees – it will likely cool before that heat gets into the yogurt. But if you accidentally raise the temperature higher, take the yogurt out of the oven until the oven cools back to 115 degrees.*
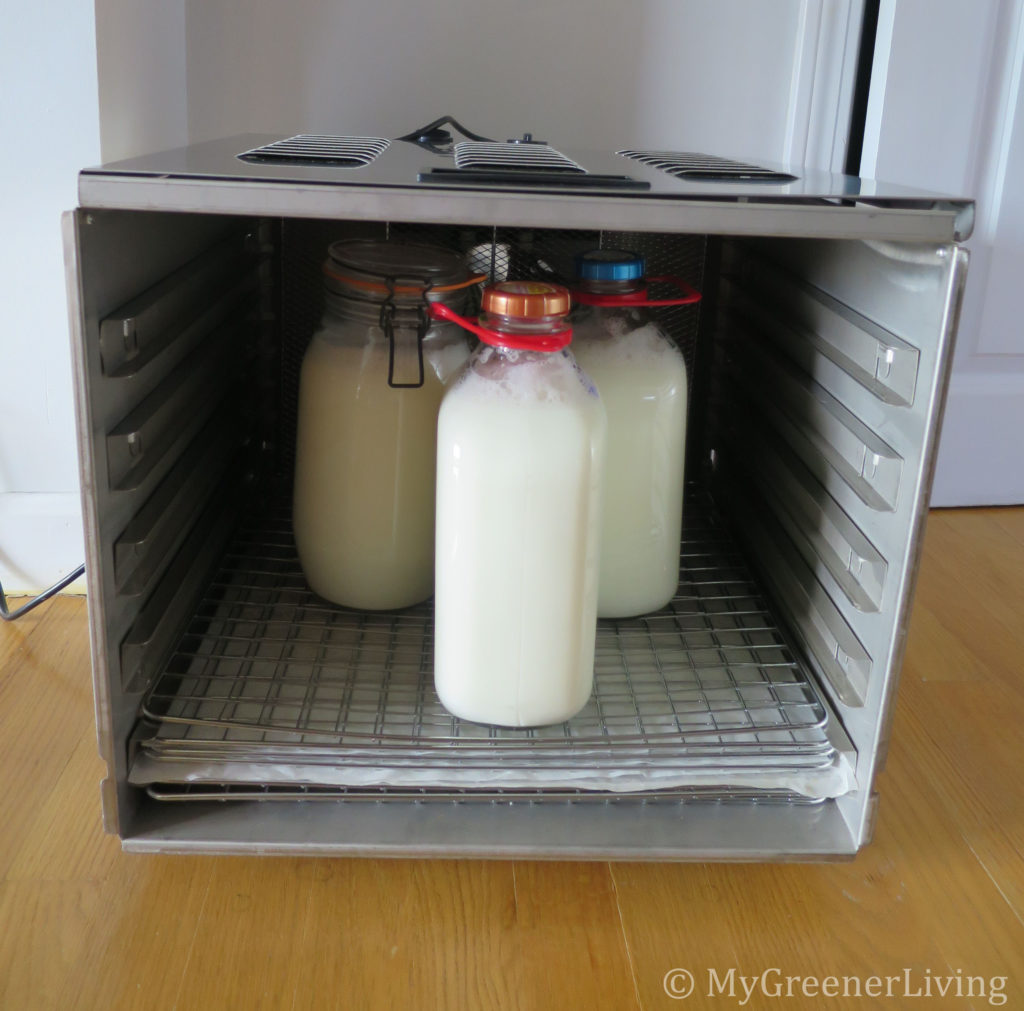
Greek yogurt “cooking” in a dehydrator - To check if the yogurt is done, turn the jar at a slight angle. If the milk flows so the top surface is parallel to the floor your yogurt needs more time (or something went wrong). If the top of the yogurt stays in place when you turn the jar, you’re done cooking! You can now put all of the yogurt into the refrigerator, or go to step 10. If the yogurt is still very liquid-y, “cook” longer.

fully “cooked” yogurt - Line a large colander with a flour sack towel folded into quarters, or a tight weave dish cloth. Place the colander over a large bowl. If you started with 1 gallon milk, make sure your bowl holds at least 8 cups UNDER the bottom of the colander.

colander lined to strain yogurt - Carefully pour the yogurt into the lined colander and place in the refrigerator for 4-8 hours. Less time will result in thinner yogurt; more time for thicker yogurt. When I strain 1 gallon at a time using quartered flour sack towel, about 5 hour strain results in 8 cups of a thick, creamy yogurt.

strained yogurt with whey - Once the yogurt reaches desired consistency, use a spoon or spatula to scoop the yogurt out of the lined colander and into storage jars. I store my Greek yogurt in the same jars that I used to “cook” the yogurt. Or in individual 1-1.5 cup mason jars. Save the whey (liquid drained out of the yogurt) to use in another recipe. Refrigerate the Greek yogurt and whey.
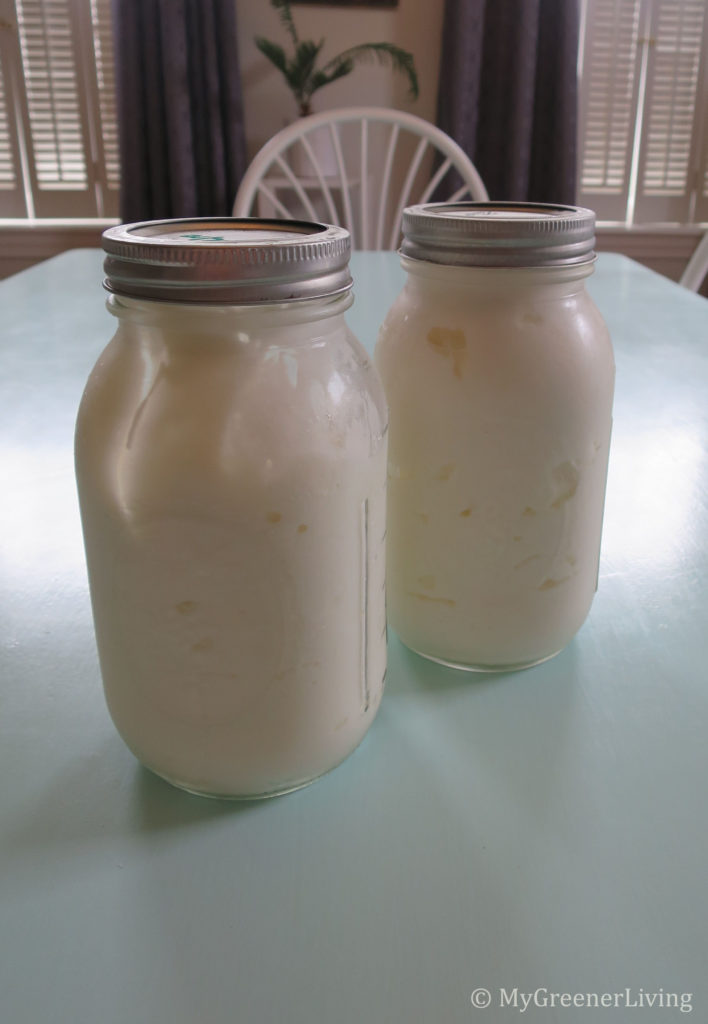
finished product – 2 quarts Greek yogurt
Serving Suggestions

Store-bought yogurts and Greek yogurts come in countless flavors, and you can make many of those flavors at home! Here are some of my favorite “recipes.”
- 6-8 oz Greek yogurt + 1/4 to 1/2 cup blueberries (fresh or frozen) + pinch pure stevia.
- 6-8 oz Greek yogurt + 1/4 to 1/2 cup raspberries (fresh or frozen) + pinch pure stevia.
- 6-8 oz Greek yogurt + 1/4 to 1/2 cup mixed berries (fresh or frozen) + pinch pure stevia.
- 6-8 oz Greek yogurt + 1/4 to 1/2 cup raspberries (fresh or frozen) + pinch pure stevia + 1/2 to 1 tsp cocoa powder.
- 6-8 oz Greek yogurt + splash vanilla extract (~ 1/2 tsp) + pinch pure stevia + 1 tsp cacao nibs.
- 6-8 oz Greek yogurt + splash vanilla extract (~ 1/2 tsp) + pinch pure stevia
- 6-8 oz Greek yogurt + 1 tsp ground cinnamon + 1 tsp chia seeds + 1 tsp ground flax seeds + 1-2 Tbsp oats + pinch pure stevia.
- …and whatever flavors I feel like trying at the time!
Ingredient choices
I choose to purchase dairy products from cows that are NOT treated with hormones. Brands and packages will specify “rBST free” or similar. I researched whether or not it is worthwhile to purchase organic milk and dairy. My verdict is that organic doesn’t matter so much, just rBST free. So, when organic is similar price I buy it (overall I like supporting organic), but if there is a big cost different I will buy non-organic.
Part of my lifestyle involves avoiding plastic whenever possible. I do this for 2 reasons. 1, plastic is awful for the environment and once created, will never fully break down. 2, synthetic chemicals from plastic can leach into food and drink, especially when heated. The milk I buy is pasteurized, which means it is heated, and I have no way of knowing if it is heated when it is bottled in plastic.
My preference is to buy milk in glass jars, but I have not found any retail stores nearby to support this. If I find myself near milk in glass I buy it. When that’s not an option, I choose to purchase milk in half gallon paper cartons. These cartons are about 80% paper, according to earth911.com, which is fully recyclable in most places.
Cost
Cost to make your own Greek yogurt depends on 2 main things: milk packaging/type, and desired Greek yogurt thickness.
For comparison, I can typically find a quart (4 cups) container of Greek yogurt for $3.49.
1 gallon of 1% cow’s milk in a plastic jug is about $2.79
1 gallon of cow’s milk in 1/2 gallon cartons is 2x$2.95=$5.90.
1 gallon of cow’s milk in 1/2 gallon glass jars is 2x$3.49=$6.98
My thickness preference is a little thinner than store bought Greek yogurt. 1 gallon milk yields 1/2 gallon (8 cups) Greek yogurt. Based on this thickness, cost per 4 cups is:
plastic: $2.79/2=$1.40
carton: $5.90/2=$2.95
glass: $6.98/2=$3.49
Looking at just the cost, and not accounting for your time making the yogurt, my homemade Greek yogurt is equal to or less expensive than purchasing Greek yogurt.
Have you ever made your own yogurt? Do you make any other foods that most people buy? Share in the comments below!