Cleaning with Bar Keeper’s Friend

Several years ago, a good friend of mine introduced me to Bar Keeper’s Friend.  “It’s amazing.  It cleans everything.  You need to try it.”  I honestly don’t know if I even had a specific cleaning need at the time.  But I found ways to clean with it, and I absolutely love it.


Disclaimer:  This post contains affiliate links.  See my Disclosure Policy for more information.


Bar Keeper's Friend Title

Note: Bar Keeper’s Friend is not as “natural” as I prefer, however I still feel it is beneficial in my cleaning regime, and I have not found any other product or cleaning method that accomplishes the same thing. 

How I use Bar Keeper’s Friend Cleanser and Polisher

To use Bar Keeper’s Friend, I:

photo of Bar Keeper's Friend instructions

  1. Sprinkle a little of the powder on the area to be cleaned, 
  2. Dampen a kitchen cloth with water (a paper towel may be used)
  3. Using the dampened area of the cloth, I rub the Bar Keeper’s friend into the area to be cleaned.  If more water is needed, I spray water onto the surface to be cleaned. 
  4. Once done cleaning, I rinse the cloth well with clean water.  I then use this damp cloth to wipe down all areas that the Bar Keeper’s Friend touched (e.g. stove surface).  I rinse the cloth out as needed.  If I used Bar Keeper’s Friend on a smaller surface that I can fit in the sink (e.g. pots), I wash out the product using my liquid castile soap and water.  

Bar Keeper's Friend with aluminum pot,cloth, and spray bottle

As with any cleaner, I use only as much as I need, I ensure that I wash my hands thoroughly after contacting Bar Keeper’s Friend.  I recommend wearing gloves when using, but I won’t lie, I don’t, and I’ve never had a reaction. 

Where I Use Bar Keeper’s Friend 

I use Bar Keeper’s Friend Cleanser and Polisher for a variety of uses, mainly in the kitchen.  The manufacturer also provides suggested uses on their website and on the packaging. 

photo of Bar Keeper's Friend back

Sink

I have a stainless steel sink.  It stains.  There’s this one spot that always gets a rust stain.  And Bar Keeper’s Friend makes it go away.  It’s like magic.  Additionally, I scrub my whole sink with Bar Keeper’s Friend a couple times a year a least.  While it is pretty easy to keep stainless steel looking good with regular washing out with just water and castile soap, Bar Keeper’s Friend really cleans well, and makes my sink look brand new.

Brushed nickel kitchen faucet

On my kitchen sink, I have a brushed nickle faucet, handle, and soap dispenser.  These get a lot of water spots on them when I am washing dishes.  Just a little Bar Keeper’s friend on a damp cloth will polish the kitchen faucet and accessories very well. 

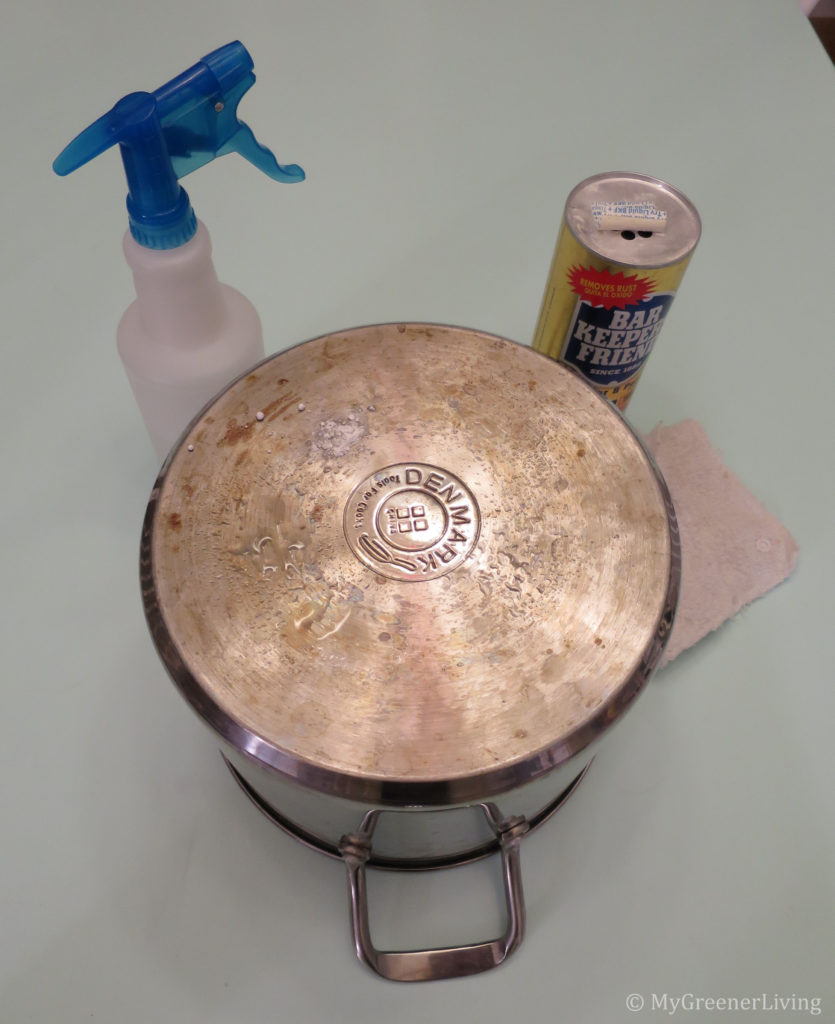
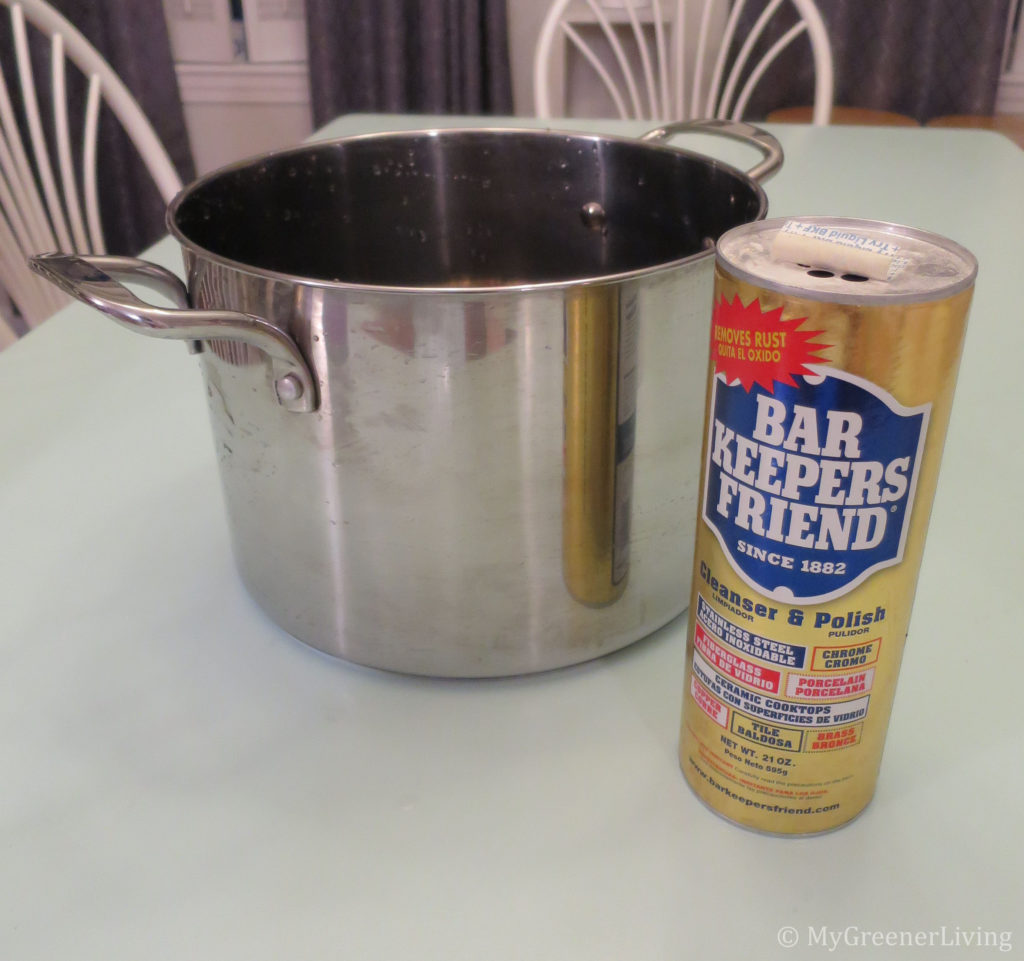
Stainless steel pots

I have a couple heavy bottom stainless steel pots. Recently I noticed a few rust spots on the bottom of my favorite pot.  I grabbed my Bar Keeper’s Friend, sprinkled a little on the rust stain, rubbed in with a damp cloth, and the rust was gone.  I ended up polishing the entire pot with Bar Keeper’s friend, and it shines like new.  To ensure that any residue was removed before I cook in this pot again, I made sure to wash the pot very, very well with castile soap and water after.  Note: do NOT use Bar Keeper’s Friend on cast iron cookware.

Pot before/during/after cleaning with Bar Keeper's Friend
Before cleaning, top left polished, entire pot polished, entire pot polished and washed
Stove

I have used Bar Keeper’s Friend to clean both a glass cooktop stove and the ceramic top of my gas stove.  Bar Keeper’s Friend does a great job of polishing the glass or ceramic surface.  It is not gritty and has never left a scratch in these smooth surfaces, and it does a fantastic job of removing the stains left by burned on liquids.  Note: do NOT use Bar Keeper’s Friend on the cast iron grates of your gas stove.  

Counters

I have ugly old laminate Formica countertops, and Bar Keeper’s Friend does a great job to cleaning the water stains.  It also does a fine job of general cleaning, but I typically just use castile soap and water or vinegar and water for everyday countertop cleaning.  When I do use Bar Keeper’s Friend on my counters, I make sure after to use a very damp cloth and wipe down the counters well to attempt to remove any traces of Bar Keeper’s Friend.  Note:  I do not have a stone countertop, and cannot say if Bar Keeper’s Friend is safe to use on other counter surfaces.   However, the manufacturer’s Safety Data Sheet for Bar Keeper’s Friend says not to use on granite or marble or porous surfaces, so I would use extreme caution if you have a stone countertop.  

Random other metal surfaces

The Bar Keeper’s Friend Safety Data Sheet specifies that you should not use the product on “cast iron, granite, marble, wood, fabric, leather, painted surfaces, mirrors, gold, or silver (sterling silver is OK).”  Other than those caution items, I am willing to try Bar Keeper’s Friend on pretty much anything.  As she was taking down Christmas ornaments, my mom noticed that a metal ornament had some signs of discoloration spots.  Rust, maybe?  I suggested that my mom try polishing it with Bar Keeper’s Friend, though I cautioned that I did not know if it would discolor the metal.  She tried it, and, voila, the ornament looks shiny and new!  

mixed metal ornament after cleaning with Bar Keeper's Friend
mixed metal ornament after polishing with Bar Keeper’s Friend

Note:  I HIGHLY recommend that if you want to try Bar Keeper’s Friend on a surface on which you have never tried it before, test on a small space in an area that is not easily visible.  This way, you won’t show damage if the Bar Keeper’s Friend reacts with the new material. 

Ingredients and safety

The manufacturer, SerVaas Laboratories, openly publishes their ingredient list and safety information online on the Safety Data Sheet for  Bar Keeper’s Friend.  

Typically I get all of my chemical and product health and safety information from the Environmental Working Group.  However, the EWG has not reviewed Bar Keeper’s Friend or each of its individual ingredients.  While I can’t give the EWG’s evaluation, here’s what I was able to find.

Feldspar

Feldspar got an EWG rating of C (on a scale of A-F with A being best) because there is “no data, some concern.”  Since there is “no data” on this, I have trouble believing this “C.”  According to a website about minerals, feldspar is made of naturally occurring minerals in the earth that contain silica and alumina, and makes up about 60% of rocks on earth.  While I would agree that consuming feldspar is not a good idea, I don’t see harm in using it as a cleaner.  

Linear sodium dodecyl benzene sulfonate

Linear sodium dodecyl benzene sulfonate (DDBSA) does not appear in the EWG database, but my research has found that this is an organic compound that is readily biodegradable (it breaks down easily and won’t persist in this form for long in nature), and several studies indicated that this is only harmful to animals in large doses.  It’s a skin and eye irritant, but from my experience this is not bad.  I am highly susceptible to contact dermatitis, but I have never experienced skin irritation after using Bar Keeper’s Friend.  I believe this is due to using the product sparingly, and always thoroughly washing/rinsing the surfaces and my hands after use. 
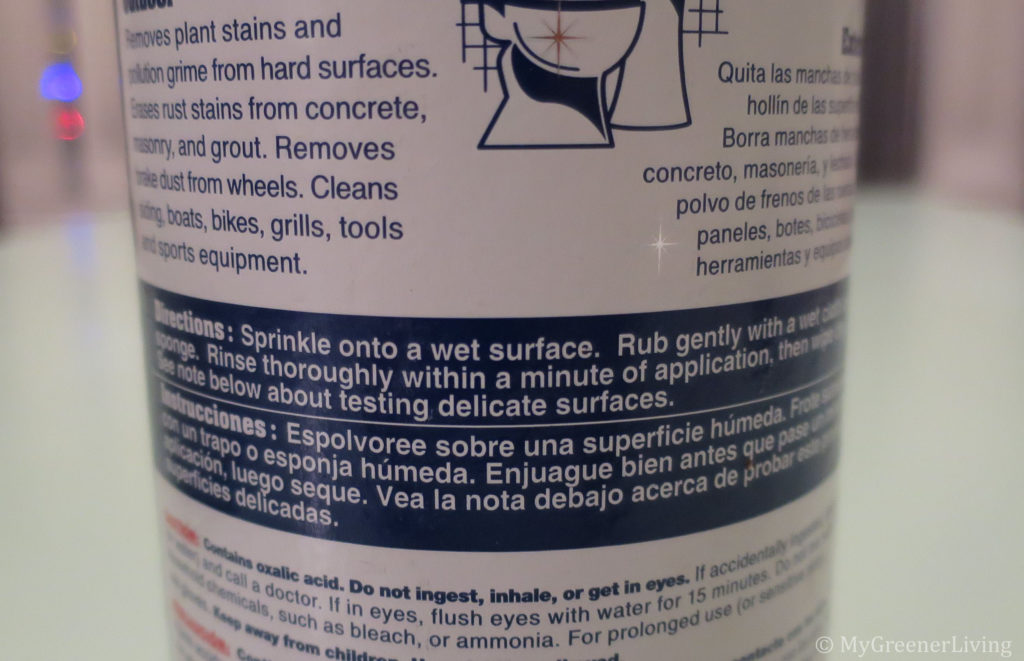
Oxalic Acid

Oxalic acid (7.5-9.5% by weight)- EWG rating D  – moderate concern for skin irritation, eye irritation, harmful if swallowed, kidney damage, and causes acute toxicity in aquatic life.  However, this product is “readily biodegradable” so I have less concern about this being harmful to the environment because it will not remain oxalic acid for long before breaking down.  Additionally, oxalic acid is naturally ocurring in foods, so I am really not concerned about the small amount of contact that I get on my skin when using Bar Keeper’s Friend.  

How does it work? (non-nerds may want to skip this section)

I’m a science nerd and I always want to understand how things work.  When I first used Bar Keeper’s Friend and saw it remove rust, I needed to understand how.  It’s simple chemistry, really.

   Oxalic acid + rust + water –> water soluble ion + water + hydrogen ions

   6C2H2O2 + Fe2O2 + nH2O –> 2[Fe(C2O4)3]3- + 3H2O + nH2O+ 6H+

Oxalic acid dissolved in water (or Bar Keeper’s Friend dissolved in water) combines with rust to form a water-soluble iron ion, water, and hydrogen ions.  

Fe(C2O4) combines with water forming Fe(C2O4)(H2O and)2 and harmlessly washes away.  Hydrogen ions just lower the pH of the water.

Just like that, poof, the rust disappears from my metal surfaces!  

Bar Keeper's Friend with aluminum pot

Cost

Bar Keeper’s Friend is readily available at grocery stores, Walmart, Amazon, Home Depot, and likely others locations. 

At the time of the writing of this, prices are:

Home Depot $1.48 for 15 oz. ($0.10/oz)

Amazon $9.99 for 2 x 21 oz = 42 oz ($0.24/oz)

Walmart $1.93 for 21 oz ($0.10/oz)

I’ve had a 21 oz container for about 5 years, use it fairly regularly, and still have about 3/4 of the bottle remaining.  It seems to really last a long time, and in my opinion is really economical.  Also, because I use it so sparingly, I have minimal contact with the possibly not-so-good-for-me ingredients. 


Have you used Bar Keeper’s Friend?   Where do you use it?  Please share in the comments below!

DIY DampRid

It’s the middle of winter.  The air is so dry I shock myself every time I turn on a light switch.  My poor skin is dry and cracking.  And my humidifier just died.  So why on earth am I talking about DIY DampRid, a way to remove moisture from the air?  Because I need it in the winter, all because of an energy saving measure that I have taken in my home.


Disclaimer:  This post contains affiliate links.  See my Disclosure Policy for more information.


DIY DampRidI live in a fairly modern home (built in the 1990’s), so my walls have good insulation, and I have fairly well insulated double-pane windows.  But regardless of how good windows are, windows (and glass doors) are a major heat leak point in any home.  In addition to leaks around the window or door, heat transfers through glass much more quickly than through insulated walls.  

Reducing heat loss through windows with curtains

Lucky for us, there is a fairly simple and inexpensive way to reduce heat loss through windows.  It took me 4 or 5 years, but now every window and glass door in my home has an energy saving heavy weight curtain that can be drawn to cover the window.  I put these curtains up every fall, and draw them closed each night through the spring. 

energy efficient curtains
How do these curtains reduce heat loss from my home?

Simply put, curtains block the hot air inside my house from escaping outside, and the cold air from outside from coming inside past the curtains.  The curtain forms a physical barrier between the cold air coming in the window, and the warm air inside my house.  This keeps the inside of my house warmer, without using more energy to heat my home! 

energy efficient curtains
foam backing of an energy efficient curtaion

I pull the curtains closed when the sun sets, and keep them closed until sunrise in the morning.  I open the curtains in the day time to let the light shine inside, which also lets the heat from the sun into the house. 

energy efficient curtains
energy efficient roman shade
Why do you need to remove moisture from your home in the winter?

When the curtains are drawn closed, there is pretty much no air circulation in the space between the window and curtain.  Between the lack of circulation and the fact that the air between window and curtain is warmer than the air outside the window, condensation forms on the inside of the window.  I used to find that these areas where condensation formed were breeding grounds for black mold.  I though that if I could remove the moisture from the windows, mold would not grow, making my home cleaner.  Turns out, I thought right, and DampRid was the solution.

condensation in window
condensation on the inside of a window in winter

DampRid

DampRid is a readily available household product that is often marketed targeting damp, musty basements.  It is made of one simple active ingredient – calcium chloride crystals – and a container.  DampRid provides this handy reference page that tells you what the product is and how it works.  The Do-It-Yourself, or DIY, DampRid works exactly the same way!

DIY DampRid
my container for DIY DampRid
What is calcium chloride?

Calcium chloride, CaCl2, is a super interesting chemical that is primarily used as an ice melt.  Calcium chloride absorbs moisture and, in the process, releases heat.  This heat releasing – exothermic – process makes it great as an ice melt.  As soon as it absorbs a little bit of moisture, it starts heating, thereby melting nearby snow and ice, which causes more heat…in a cycle that is great for melting ice!

Calcium chloride container
50 pound tub of pure calcium chloride

Calcium Chloride, the active (only!) ingredient in DampRid got an Environmental Working Group rating of A on an A-F scale with A being the most benign or lowest concern.  There are few or no known or suspected hazards to health or the environment.

Very Important: be sure to keep calcium chloride in a well-sealing, watertight container at all times before using as ice melt, DIY DampRid, etc. Once exposed to moisture, the calcium chloride starts “working” and absorbing water.  If it does this in storage, it won’t be able to when you need it!

Calcium chloride container
pure calcium chloride
DIY DampRid

I have tried a few different containers for DampRid, and my favorite is made from a 2-cup wide mouth mason jar and a 6oz round yogurt container. Here’s how I do it.

DIY DampRid
supplies I use to make DIY DampRid containers

DIY DampRid Supplies:

  • 2 cup wide mouth mason jar (I’ll call this “larger container”)
  • plastic container that fits within the mason jar (I’ll call this the “smaller container”)
  • calcium chloride crystals (prior to use store in watertight container)
  • sharp knife, ice pick, or other sharp object to pierce the plastic container
DIY DampRid
making my DIY DampRid container

How I make my DIY DampRid containers:

  1. I wash and dry my containers, if not already done. 
  2. Very, very carefully, I use my ice pick to puncture many small holes in the bottom of the smaller container.  My aim is to make the holes large enough for the liquid to readily flow through, but small enough that the calcium chloride crystals will not fall through. 
  3. Place the smaller container inside the larger container.  
DIY DampRid
making my DIY DampRid container

I’ve also tried a few different 2-layer containers.  I like the 2 layers, where the top layer contains the calcium chloride crystals, and a bottom layer to catch the liquid that forms when the calcium chloride mixes with the water in the air.  

DIY DampRid
calcium chloride in another of my DIY DampRid containers

An alternate – and the simplest – option is a single storage vessel with calcium chloride crystals poured inside.  The crystals will sit in the calcium chloride-water liquid, but the exposed calcium chloride will still capture the moisture.  

Using DampRid

Containers of DampRid can be placed anywhere and will absorb moisture from the air.  I recommend placing out of reach of children and pets. 

I place a container of my DIY DampRid in each of my windows and next to each door, between the glass and the energy efficient curtain.  The DampRid absorbs moisture in the air gap that forms between the window and curtain.  I also open the curtains to let air circulate during sunny days. 

Every few weeks, I empty the contents of the larger container into the toilet and flush to dispose.  Per DampRid’s guidance, the dissolved calcium chloride can be safely disposed by flushing down a toilet or dumping into a sink with running water.  Then I refill the smaller container with more calcium chloride.

DIY DampRid
calcium chloride in my DIY DampRid container after absorbing moisture for a few days

 On very cold, cloudy days, I sometimes keep the curtains drawn to keep the cold out.  But when the sun is out, the solar heat that my home can absorb through open curtains is greater than the heat the curtains contain inside, so I throw the curtains wide open. 

In the southern New England climate where I live, I have found that the “winter” curtains and DIY DampRid are useful from about October through April.  Once the nights start staying warmer (in the 50’s Fahrenheit) I stop drawing the curtains at night, or take them down and replace with my “summer” curtains.

DIY DampRid
DIY DampRid in a window

Cost

Calcium Chloride

Since calcium chloride is usually sold in large/heavy quantities, it is usually more cost effective to purchase in a brick and mortar store rather than online.  I purchased my 50 lb plastic tub of calcium chloride from BJ’s Wholesale Club 3 or 4 years ago.  I use it in my DIY DampRid, and also on my concrete walkway as ice melt.  It is available online at Amazon and likely hardware stores.  I believe I paid $30 for 50lbs.  I also just saw a 10 lb container at Ocean State Job Lot for $10.  Living in New England where calcium chloride is readily available, I wouldn’t pay more than $1/lb for calcium chloride.

Containers

Mason jars cost roughly $1-$2 per jar.  I shop around Walmart, Ocean State Job Lot, Christmastree Shops, and grocery stores looking for sales and deals.  I usually can get my mason jars for $10-13/dozen.

The inner container that I use in my DIY DampRid is some recycled platic container from another product that I have purchased.  Yes, I avoid buying plastic when I can, but I do purchase on occasion.  My favorite 6 oz yogurt containers in my DIY DampRid actually came from a friend for me to use as a soap mold, but I re-purposed it again.  Thanks, R!  I have also used the larger 16oz and 32oz yogurt and cottage cheese containers for the larger container in my 2-layer DIY DampRid. 

DampRid

DampRid typically costs about $4.50-$5.00 for 2-10.5oz containers, or about $2.25 per 10.5oz container.  (I’ve seen it at Amazon and Walmart.  Note: If I purchased, I would purchase fragrance free, but it’s tougher to find.)

DIY DampRid

Assuming calcium chloride crystals can be purchased for $1/lb ($1/16oz x 10.5oz = $0.66 for the amount that comes in one package of DampRid) and you can make your container for $1.50, your total cost for one DIY DampRid plus container is $2.16.  You can refill this indefinitely at a cost of $0.66 each!  

Curtains

I am a bargain hunter.  While curtains can cost upwards of $60 per pair, I don’t believe that they need to cost so much.  I shop around for energy saving/energy efficient/room darkening curtains.  They all have the insulating characteristics that I am looking for.

Most of the curtains in my home cost $10 per pair or less.  I really splurged on the kitchen/dining room curtains – I paid $80 for 4 pairs of 84″ long curtains.  They’re Duck River Textiles, and the quality is fantastic.  I have had great luck finding nice looking, nice quality, and budget friendly curtains at Christmastree Shops.  There, I am able to purchase pairs of curtains for $10, and I often wait until there is a 20% off coupon.  $8 per window is a great deal in my opinion!  Over the years, they are definitely saving me money in home heating costs. 

Why DIY DampRid instead of just buying DampRid?

DIY DampRid costs marginally less than purchasing DampRid.  You can refill your DIY containers, or the DampRid containers.  I prefer the DIY version for the following reasons:

  • I can find/make containers in any size to fit the location where I need DampRid (the standard 4.5 inch diameter DampRid containers will not fit in my window)
  • Containers that I already have can be reused, rather than purchasing more plastic
  • I can make DIY DampRid using less plastic


Do you do anything to “winterize” your home?  Please share in the comments below!